Tools
The Tools screen gathers three utilities in a single grid: Projection, Super Resolution, and Model Mixing.
Projection
The Projection tool allows loading a target image, a text prompt, or a combination of both, to find the closest corresponding latent vector of a trained model. Different methods are provided to search for the corresponding latent vector that you can choose from. The output is the calculated vector plus a process video showing the search process.
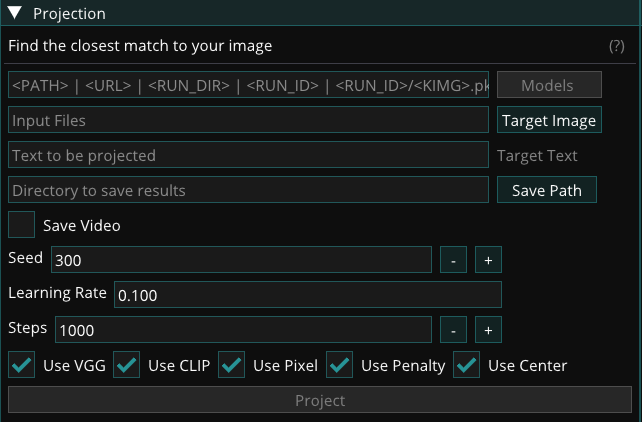
The following options are available for projection:
- Models: Select the .pkl file of the model used for projection.
- Target Image: Choose a single image that should be found in the model.
- Target Text: Provide a description of an image that should be found in the model.
- Save Path: Specify the path where the closest match should be saved. The saved result includes the position in the model and the closest match.
- Save Video: Select this option to save a video of the process of finding the closest match.
- Seed: Select a seed to ensure consistent results for the closest match.
- Learning Rate: Adjust the learning rate of the projection to control convergence speed. Higher values result in faster projections but may be less accurate.
- Steps: Determine the number of steps for the projection. Higher values increase accuracy but require more time.
- Use VGG: Enable this option to use the VGG16 network for calculating image distance based on general features rather than pixel-by-pixel comparisons.
- Use CLIP: Enable this option to use the CLIP network for calculating image and text distance based on general features rather than pixel-by-pixel comparisons.
- Use Pixel: Enable this option to use pixel distance for image comparison. This puts more weight on pixel similarity between the match and the target.
- Use Penalty: Enable this option to penalize large update steps, resulting in a smoother projection and avoiding local minimums.
- Use Center: Enable this option to use an additional center crop as the target image. This can improve matching accuracy but may reduce overall accuracy.
Super Resolution
The Super Resolution tool provides the feature to upscale images and videos for higher resolution distribution of your work. There are three different models available: Quality, Balance, and Fast. While the Processing speeds of the models differ, Quality being the slowest and Fast being the fastest, the slower models tend to preserve more details from the original image/video. However, the quality of the results also depends on the type of visual content and is better to be tested with all three models to find the desired option.
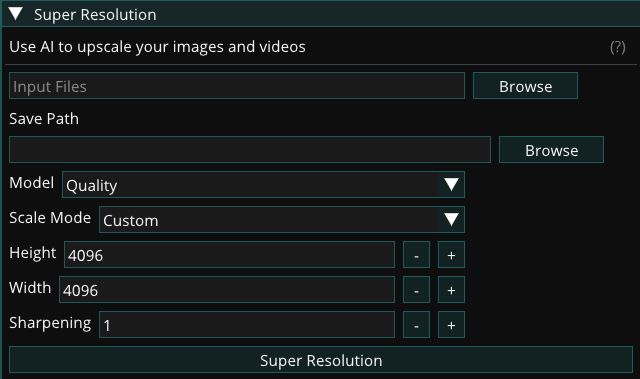
The following options are available:
- Input Files: Select the path to the images or videos that should be upscaled. Multiple files can be selected at once.
- Result Path: Specify the path where the upscaled images or videos should be saved.
- Model: Choose the upscaling model to be used: Fast, Balanced, or Quality. Fast is the quickest but provides lower quality, while Quality is the slowest but provides the highest quality.
- Scale Mode: Choose between defining the exact Height and Width of the output or using a Scale Factor. If the scale factor is selected, the height and width will be automatically calculated based on the scale factor.
- Sharpening: Adjust the sharpness of the upscaled image. Sharpening=1 means no added sharpness. Higher values result in sharper images but may introduce artifacts.
Model Mixing
This tool provides the ability to mix two trained models to make a new model. It works based on selecting parts of one model and parts of a different model, thereby mixing the features of the two models.

To mix two models, specify the following:
- Model 1: Select the .pkl file of the first model to be mixed.
- Model 2: Select the .pkl file of the second model to be mixed.
After pressing "Combine," you can select the layers to be used from each model. The layers are listed in order, from early to late layers. While lower-resolution layers (e.g. 4x4, 8x8, 16x16) correspond to coarse and higher-level features, higher-resolution layers correspond to fine features and textures. This can be used to determine what type of features the mixed model inherits from each source. Each layer can also be expanded to select detailed components for advanced mixing. Additionally, features can be removed from the mix. This can be useful when one of the models generates images of higher resolution, and you want to align the resolution with the lower-resolution model.
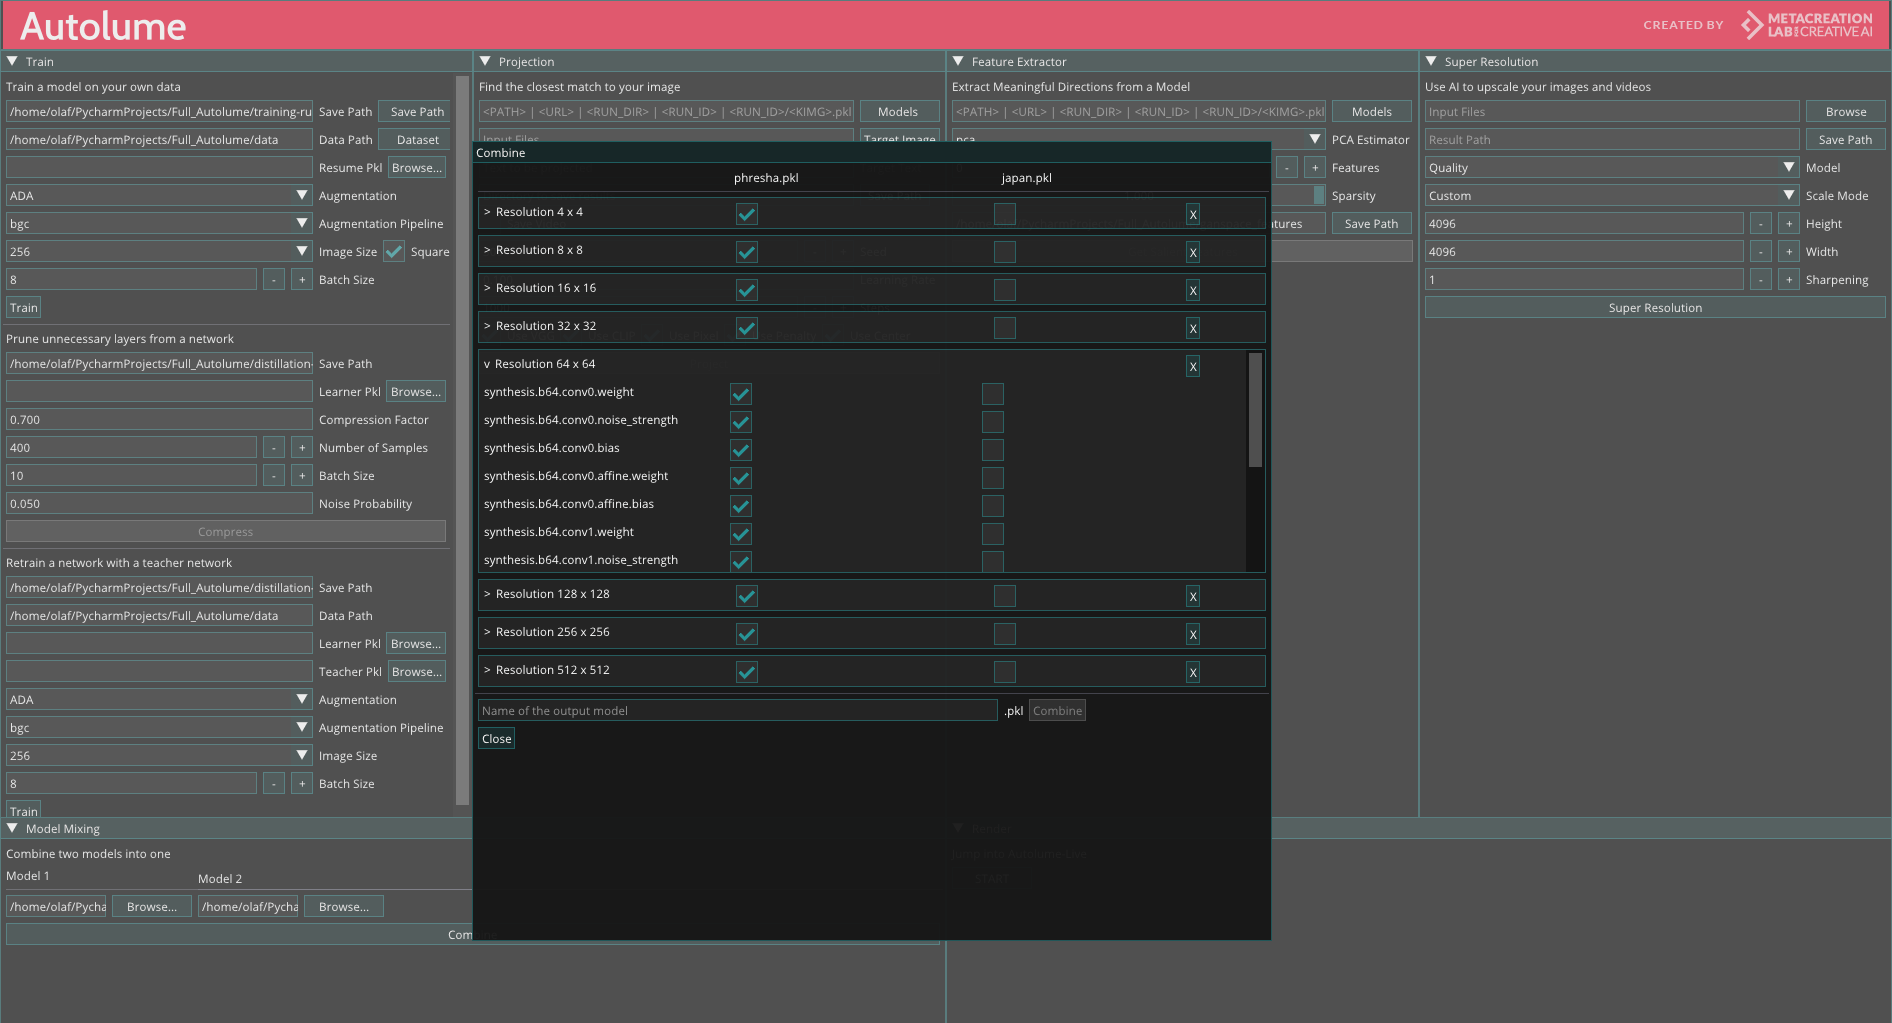
Finally, you have the option to save the mixed model as a new .pkl file, which can be used anywhere in Autolume.
For real-time model mixing on the Perform screen, see Model Mixing (real-time).